18Feb

An In-Depth Guide to Flask: The Lightweight Python Microframework

Flask is a powerful, flexible, and lightweight web framework for building web applications with Python. Often referred to as a “microframework,” Flask offers the essentials for building a web application without enforcing specific project structures or requiring additional tools. Whether you’re a beginner or an experienced developer, Flask provides an ideal balance of simplicity and extensibility. In this article, we’ll explore the key features of Flask, its benefits, and common use cases.


What is Flask?

Flask is an open-source web framework for Python, designed to be simple, yet powerful, allowing developers to build small to large-scale web applications efficiently. Unlike heavier frameworks like Django, Flask follows the microframework philosophy, meaning it provides the core features required for web development and leaves the rest to developers, giving them the flexibility to use only what they need.

Flask is designed with a minimalistic approach, providing essential components like URL routing, templates, and request handling. It doesn’t include things like database management or form handling out of the box, but it can easily be extended with third-party libraries or custom code to add those features.


Key Features of Flask

1. Minimalistic Core

Flask’s minimalistic core includes only the essentials required to build a web application, leaving other components up to the developer. This lightweight approach makes Flask highly flexible and suitable for small applications as well as complex, enterprise-level systems.

  • Customizable: Flask doesn’t impose any project structure, so developers have complete control over how the application is structured.
  • Small Footprint: Flask itself is small in size, keeping dependencies to a minimum and making it easy to deploy applications with minimal overhead.

2. Routing

Flask provides a flexible URL routing system, allowing you to map incoming requests to specific view functions. You can define routes using Python decorators and customize routes with parameters.

  • Dynamic URL Parameters: Flask allows dynamic routing, so you can capture URL parameters directly from the URL and pass them to the view functions.
  • RESTful Routing: Flask makes it simple to implement RESTful services by following a clean, human-readable URL structure.

3. Template Engine

Flask uses Jinja2, a powerful and flexible templating engine, to render dynamic HTML templates. Jinja2 allows you to inject dynamic content, loops, conditional logic, and more directly into your HTML templates.

  • Template Inheritance: Jinja2’s template inheritance feature allows you to create base templates and extend them across different pages, making your application easier to maintain.
  • Filters and Macros: Flask supports built-in filters and macros that help manipulate data and reduce repetitive code in your templates.

4. Request Handling

Flask provides a straightforward way to handle incoming HTTP requests. You can capture query parameters, form data, and headers with simple access methods, making it easy to manage HTTP requests.

  • HTTP Methods: Flask supports common HTTP methods such as GET, POST, PUT, DELETE, etc., allowing you to build RESTful APIs and handle user requests efficiently.
  • Request and Response Objects: Flask provides request and response objects that give you easy access to incoming data (e.g., form fields, JSON payloads) and the ability to send customized responses.

5. Extensibility with Extensions

Flask is highly extensible through third-party extensions, which enable features like database integration, user authentication, form validation, and more. Popular extensions include:

  • Flask-SQLAlchemy: Adds support for SQL databases like MySQL and PostgreSQL using the SQLAlchemy ORM.
  • Flask-WTF: A form handling library that integrates with Flask and Jinja2.
  • Flask-Login: Manages user sessions and authentication for web applications.
  • Flask-RESTful: Makes it easy to create RESTful APIs with Flask by providing additional tools and resources.

6. Development Server and Debugger

Flask comes with a built-in development server and debugger, which makes it easy to test and debug your applications during development. The built-in debugger provides detailed error messages, stack traces, and allows for live code updates.

  • Auto-Reload: The development server automatically reloads your code as you make changes, providing immediate feedback.
  • Interactive Debugger: The interactive debugger allows you to inspect the application’s state in the event of an error, helping you quickly identify and fix issues.

7. Session Management

Flask provides built-in support for sessions, which allow you to store data on the server side between different requests from the same user. You can store user-specific information like authentication status, shopping cart contents, or preferences.

  • Secure Cookie-Based Sessions: By default, Flask stores session data in secure, encrypted cookies, ensuring that sensitive information is kept safe.

Benefits of Using Flask

1. Flexibility and Simplicity

Flask’s minimalistic and flexible nature gives developers full control over the structure and components they use in their applications. It’s up to the developer to decide what libraries and tools they need, allowing for a more tailored development experience.

  • No Constraints: Flask doesn’t impose any structure on your application, so you can organize your project as you see fit.
  • Lightweight: With a small footprint, Flask applications can be deployed quickly without the bloat often associated with larger frameworks.

2. Easy to Learn and Use

Flask is beginner-friendly and provides an intuitive API that’s easy to understand for developers new to web development. Its concise and readable documentation makes getting started straightforward.

  • Minimal Boilerplate: Flask doesn’t require much code to get started. You can build a basic web app with just a few lines of code, allowing you to focus on building your application rather than dealing with complex setup.

3. Scalability

While Flask is often chosen for small applications, it can also handle larger, more complex projects. By using extensions and adding other tools as needed, you can scale your Flask application to meet your project’s requirements.

  • Modular Design: Flask’s flexible structure lets you scale your application in small steps. As your application grows, you can easily add components such as authentication, database management, and API integrations.
  • Microservices Architecture: Flask is a great option for building microservices-based applications, as it is lightweight and can be easily deployed as standalone services.

4. Support for RESTful APIs

Flask is widely used for building RESTful APIs because of its simplicity and ability to handle HTTP requests with minimal effort. Its clean routing system and support for JSON make it ideal for creating APIs that communicate with web and mobile applications.

  • Flask-RESTful: The Flask-RESTful extension provides tools to create and manage REST APIs, simplifying the process of building scalable web services.

5. Large Community and Documentation

Flask has a large and active community, as well as extensive documentation, which ensures that help is always available. Whether you’re a beginner or an expert, you can find resources, tutorials, and solutions to common problems.

  • Active Ecosystem: The Flask ecosystem is rich with libraries and extensions, allowing you to extend the framework to meet the needs of your application.
  • Well-Documented: Flask’s official documentation is detailed and regularly updated, making it easy to find solutions to problems and learn best practices.

Common Use Cases for Flask

1. Web Applications

Flask is ideal for building web applications of any size. Whether you are building a small personal blog, a content management system, or a complex e-commerce site, Flask can handle it all.

  • Example: Flask is used by companies like Netflix for building scalable applications.

2. RESTful APIs

Flask is a popular choice for building APIs. Its flexibility and simplicity make it easy to design RESTful services that handle HTTP requests and return data in JSON format.

  • Example: Flask is commonly used to build APIs for mobile apps or single-page applications (SPAs).

3. Prototyping and MVPs

Flask’s simplicity makes it perfect for building prototypes and minimum viable products (MVPs). You can quickly spin up a basic application and iterate based on feedback, without getting bogged down in unnecessary complexity.

  • Example: Startups and developers use Flask to quickly prototype and test new ideas.

4. Microservices

Flask’s lightweight and modular nature makes it an excellent choice for building microservices-based applications, where different components of the application are broken down into smaller, independent services.

  • Example: Flask can be used to create microservices that communicate with each other via APIs.

Conclusion

Flask is a powerful and flexible Python web framework that is perfect for building web applications, APIs, and microservices. With its minimalistic design, simplicity, and ability to scale, Flask is a great choice for developers who need flexibility and control over their projects. Whether you’re building a small prototype or a large-scale system, Flask provides the tools and features you need to create efficient and maintainable applications.

By leveraging Flask’s core features, such as routing, templates, and extensibility, you can develop web applications and services quickly and with minimal overhead. Its active community, extensive documentation, and rich ecosystem make Flask one of the best choices for web development today.

18Feb

A Complete Guide to Django: Features, Benefits, and Use Cases

Django is a high-level Python web framework that simplifies the development of robust and scalable web applications. With its “batteries-included” philosophy, Django provides developers with a comprehensive toolkit for building dynamic websites quickly and efficiently. In this article, we will explore the key features of Django, its advantages, and some common use cases, to help you understand why Django has become one of the most popular frameworks in web development.


What is Django?

Django is an open-source web framework written in Python, designed to streamline the process of developing secure, maintainable, and scalable web applications. It was created by experienced developers for developers, and its main goal is to make web development simpler and faster by providing reusable components, reducing the amount of code developers need to write, and ensuring the application is secure.

Django is known for its “batteries-included” approach, meaning it comes with a variety of pre-built tools and libraries that eliminate the need for developers to reinvent the wheel. It follows the Model-View-Template (MVT) architectural pattern, which promotes organized and maintainable code.


Key Features of Django

1. MTV Architecture

Django uses the Model-Template-View (MTV) architecture, a variant of the traditional Model-View-Controller (MVC) pattern. This design pattern separates an application into three main components:

  • Model: Represents the data structure of the application. Django’s ORM (Object-Relational Mapping) system allows developers to interact with databases using Python code instead of SQL.
  • Template: The presentation layer, which manages the HTML and front-end logic. Django’s templating engine allows you to build dynamic HTML pages.
  • View: Handles the logic of the application, processes user requests, and returns the appropriate response.

2. Automatic Admin Interface

One of Django’s standout features is its built-in admin interface. It provides a ready-made interface for managing your application’s data, so you don’t need to build an admin panel from scratch. The Django admin automatically generates a user-friendly interface for CRUD (Create, Read, Update, Delete) operations on your models, making it ideal for managing site content or administering databases.

  • Customizable Admin: You can customize the admin interface to suit your application’s needs, adding custom fields, filters, and functionality.
  • Authentication and Authorization: The Django admin comes with built-in user authentication and permissions management to control access to sensitive data.

3. Built-in ORM (Object-Relational Mapping)

Django’s Object-Relational Mapping (ORM) system allows developers to interact with databases using Python code instead of raw SQL. This abstraction layer makes it easier to query, update, and manage the database without needing to write SQL queries manually.

  • Database Migration: Django’s ORM supports database migrations, which makes it easy to evolve your database schema without losing data. It tracks changes to models and automatically generates migration files.
  • Support for Multiple Databases: Django supports a variety of databases, including PostgreSQL, MySQL, SQLite, and Oracle. You can also configure Django to use multiple databases simultaneously.

4. Security Features

Django takes security seriously, providing developers with a range of built-in security features to protect applications from common threats. Some of the key security features include:

  • Cross-Site Scripting (XSS) Protection: Automatically escapes output in templates to prevent malicious scripts from being executed.
  • SQL Injection Protection: Django’s ORM prevents SQL injection attacks by automatically sanitizing database queries.
  • Cross-Site Request Forgery (CSRF) Protection: Django includes CSRF tokens for every form to prevent unauthorized requests from being processed.
  • Clickjacking Protection: Django provides middleware to protect against clickjacking attacks.

5. URL Routing

Django offers a powerful and flexible URL routing system that allows developers to map URLs to specific views in the application. It uses regular expressions to capture dynamic URL components and pass them as arguments to view functions.

  • Readable and Maintainable URLs: You can design human-readable URLs that are easy to understand and optimize for search engines.
  • URL Parameters: Django allows you to pass parameters within URLs (such as query parameters) and access them directly in views.

6. Template Engine

Django’s template engine enables developers to create dynamic HTML pages with ease. It allows you to insert data into templates, loop over collections, and include reusable components.

  • Template Inheritance: With Django’s template inheritance system, you can create a base template with common elements (such as headers and footers) and extend it across different pages.
  • Filters and Tags: Django includes built-in filters and tags to manipulate data in templates, such as formatting dates, currency, and more.

Benefits of Using Django

1. Rapid Development

Django’s philosophy of “batteries-included” provides developers with all the tools and libraries needed to build a fully-functional web application. This reduces the amount of code developers need to write and accelerates the development process, allowing you to get your project up and running quickly.

  • Pre-built Components: Django includes pre-built components for tasks like authentication, routing, and database management, which speeds up development.
  • Less Boilerplate Code: Django’s code structure encourages reusability and eliminates the need for repetitive code, which keeps your project clean and organized.

2. Scalability

Django is highly scalable and can be used for both small projects and large, complex applications. Whether you are building a small blog or a high-traffic social media platform, Django’s scalability ensures your application can handle growth.

  • Middleware: Django’s middleware allows you to add components that handle certain aspects of request processing, such as sessions, caching, and authentication. This enables you to scale your application as needed.
  • Caching: Django includes caching mechanisms that improve the performance of your application by reducing database load.

3. Community and Documentation

Django has an active, well-established community and extensive documentation, making it easy for developers to find support and resources. Whether you are a beginner or an experienced developer, the Django community provides tutorials, plugins, and solutions to common problems.

  • Rich Ecosystem: The Django ecosystem is filled with third-party packages that extend its functionality, such as Django REST Framework (for building APIs), Django Channels (for handling WebSockets), and more.
  • Official Documentation: Django’s official documentation is comprehensive and regularly updated, making it easy for developers to learn and use the framework.

4. Maintainability

Django’s clean and reusable code structure makes it easy to maintain applications over time. It encourages the use of best practices and separation of concerns, ensuring that your application remains organized and scalable as it grows.

  • Modular Design: Django encourages developers to break down their application into smaller, reusable components (called apps), making it easier to manage and maintain large projects.
  • Testing Support: Django includes a testing framework that allows you to write unit tests, helping to ensure that your application behaves as expected.

Common Use Cases for Django

1. Content Management Systems (CMS)

Django’s flexible architecture and pre-built admin interface make it an excellent choice for building content management systems. Whether you are creating a blog, an e-commerce site, or a media platform, Django provides the tools to manage and display content efficiently.

  • Example: Sites like The Washington Post and National Geographic use Django to power their content management systems.

2. E-commerce Platforms

Django is widely used for building e-commerce websites and online stores. Its built-in security features, scalability, and ability to handle high traffic make it an ideal framework for e-commerce applications.

  • Example: The PrestaShop e-commerce platform was built using Django.

3. Social Media Applications

Django’s scalability and real-time capabilities make it an excellent choice for building social media platforms, where handling large numbers of users and interactions is essential.

  • Example: Pinterest used Django for its initial development.

4. APIs and Web Services

Django is also commonly used for creating RESTful APIs, thanks to its built-in support for views, serializers, and authentication. The Django REST Framework (DRF) is a powerful toolkit for building APIs and web services.

  • Example: Many web applications, including mobile apps and single-page applications (SPAs), use Django as a backend API service.

Conclusion

Django is a robust and scalable framework that is perfect for building a wide range of web applications. With its “batteries-included” philosophy, it provides developers with a comprehensive set of tools and libraries that streamline the development process. Whether you’re building a simple blog or a large-scale e-commerce platform, Django’s security, scalability, and maintainability make it a go-to choice for developers worldwide.

By leveraging Django’s features such as the built-in ORM, admin interface, and security tools, developers can create secure, high-performance applications in record time. Its extensive documentation, active community, and vast ecosystem further cement Django as one of the best web frameworks available today.

18Feb

A Comprehensive Guide to Node.js: Benefits, Features, and Use Cases

In the world of web development, Node.js has emerged as a powerful, flexible, and efficient framework for building fast and scalable applications. As a JavaScript runtime environment built on Google’s V8 engine, Node.js allows developers to use JavaScript for server-side programming, creating an ideal environment for building real-time applications, APIs, and more. In this article, we will explore the core features, advantages, and common use cases of Node.js to help you understand why it’s one of the most popular tools for web development.


What is Node.js?

Node.js is an open-source, cross-platform runtime environment that executes JavaScript code outside of a browser. Unlike traditional server-side programming languages (such as PHP, Ruby, or Java), Node.js allows developers to write server-side applications in JavaScript, which has traditionally been used for front-end development in browsers. This unification of front-end and back-end programming makes Node.js a popular choice among developers.

Node.js is built on the V8 JavaScript engine, which is the same engine that powers Google Chrome, ensuring high performance and fast execution.


Key Features of Node.js

1. Asynchronous and Non-blocking I/O

Node.js operates on an event-driven, non-blocking I/O model. This means that instead of waiting for I/O operations (like reading files, making database queries, or handling HTTP requests) to complete before moving on to the next task, Node.js can continue processing other operations. This helps achieve high concurrency and enables Node.js to handle thousands of requests simultaneously with minimal overhead.

  • Event-driven Architecture: Node.js uses an event-driven architecture, where an event loop handles incoming requests asynchronously, allowing other operations to run in parallel.

2. Single-Threaded Model

Node.js operates on a single-threaded event loop, which processes all requests and operations asynchronously. This makes it highly efficient, as it doesn’t need to create new threads for each request, unlike traditional multi-threaded servers. Instead, Node.js uses a single thread to handle many requests simultaneously.

  • Reduced Memory Consumption: Because Node.js doesn’t rely on spawning new threads, it uses less memory compared to multi-threaded models.
  • Efficient Handling of Concurrency: Despite being single-threaded, Node.js can handle many connections concurrently due to its non-blocking I/O model.

3. Built-in Modules

Node.js comes with a rich set of built-in modules that simplify development. These modules handle various tasks such as file system interaction, HTTP requests, and networking. Some commonly used built-in modules include:

  • HTTP Module: Used to create HTTP servers and clients.
  • File System (fs) Module: Enables reading from and writing to files.
  • Path Module: Provides utilities for working with file paths.
  • Event Module: Enables the implementation of event-driven programming.

4. NPM (Node Package Manager)

Node.js comes with NPM, a package manager that allows developers to easily install, update, and manage third-party libraries and packages. With thousands of packages available, NPM enables quick integration of new functionalities and tools into your projects.

  • Large Ecosystem: NPM hosts a massive repository of open-source libraries, providing reusable code that saves time and effort during development.

5. Scalability

Node.js is highly scalable, both horizontally and vertically. Due to its event-driven, non-blocking nature, Node.js can scale to handle a large number of concurrent connections with minimal resources.

  • Vertical Scaling: You can take advantage of multi-core systems by running multiple instances of Node.js on different cores, allowing you to process more requests simultaneously.
  • Horizontal Scaling: Node.js applications can be scaled across multiple servers, creating a distributed system that can handle increased traffic.

Benefits of Using Node.js

1. Faster Performance

Since Node.js runs on the V8 JavaScript engine, which compiles JavaScript directly to native machine code, it provides high performance and speed. This makes it a great choice for applications that require fast response times, such as real-time chat applications, games, and APIs.

2. JavaScript on Both the Front-End and Back-End

Node.js allows developers to use JavaScript on both the client-side and server-side, which creates a more unified development experience. This reduces context switching and simplifies the development process, as developers can work with a single language throughout the entire stack.

  • Full-Stack JavaScript Development: With Node.js, developers can use frameworks like Express.js for the backend and React or Angular for the frontend, resulting in a full-stack JavaScript development workflow.

3. Real-Time Data Processing

Node.js is ideal for building real-time applications such as chat applications, collaborative tools, and live-streaming platforms. Its non-blocking I/O and event-driven model allow it to handle real-time data streams efficiently.

  • WebSockets: Node.js supports WebSockets, a protocol that enables two-way communication between clients and servers, making it perfect for real-time apps.

4. Easy to Learn and Use

JavaScript is one of the most widely used programming languages, and since Node.js is built on top of it, developers with knowledge of JavaScript can quickly pick up Node.js. This ease of learning reduces the learning curve and speeds up the development process.

5. Cross-Platform Development

Node.js is cross-platform, meaning it can run on various operating systems like Windows, Linux, and macOS. This makes it a flexible choice for developers who need to deploy applications on multiple platforms.


Common Use Cases for Node.js

1. Building APIs

Node.js is an excellent choice for building RESTful APIs or GraphQL APIs. With its asynchronous model and non-blocking I/O, Node.js can handle a high number of requests, making it ideal for creating APIs that need to respond to a large volume of requests in real-time.

  • Express.js: This minimal and flexible web framework for Node.js simplifies the development of APIs and web applications, providing routing, middleware, and other essential functionalities.

2. Real-Time Applications

Node.js is particularly well-suited for real-time applications that require constant updates. For example, real-time chat applications, social media platforms, and gaming applications benefit from Node.js’s ability to handle many simultaneous connections.

  • Socket.IO: This library enables real-time, bidirectional communication between clients and servers, making it perfect for chat applications, notifications, and collaborative tools.

3. Streaming Services

Node.js’s asynchronous nature makes it great for handling streaming data, such as in video streaming services or music apps. By handling data streams efficiently, Node.js can process large amounts of data without affecting performance.

  • Video Streaming: Applications that deliver video content to users in real-time, such as Netflix or YouTube-like services, can benefit from Node.js for fast data transmission.

4. Single-Page Applications (SPAs)

Node.js is also widely used for building single-page applications (SPAs), where the server delivers dynamic content to the client without requiring a full page reload.

  • Angular/React with Node.js: With frameworks like React and Angular on the frontend, Node.js provides the perfect back-end environment for managing API requests and handling dynamic content.

5. Microservices Architecture

Node.js is a great choice for developing microservices-based applications, where smaller, independent services communicate with each other. Node.js’s lightweight nature and scalability make it ideal for handling many microservices that work together.


Conclusion

Node.js is a powerful and versatile platform for building scalable, high-performance applications. Its non-blocking I/O, single-threaded architecture, and the ability to use JavaScript for both client-side and server-side programming make it a popular choice for modern web applications. Whether you’re building APIs, real-time applications, or microservices, Node.js provides the tools and features needed to develop fast and efficient solutions.

By leveraging the advantages of Node.js, developers can create applications that are not only high-performing but also scalable and easy to maintain. Its growing ecosystem and active community further enhance its appeal, making Node.js one of the most sought-after tools for web development today.

18Feb

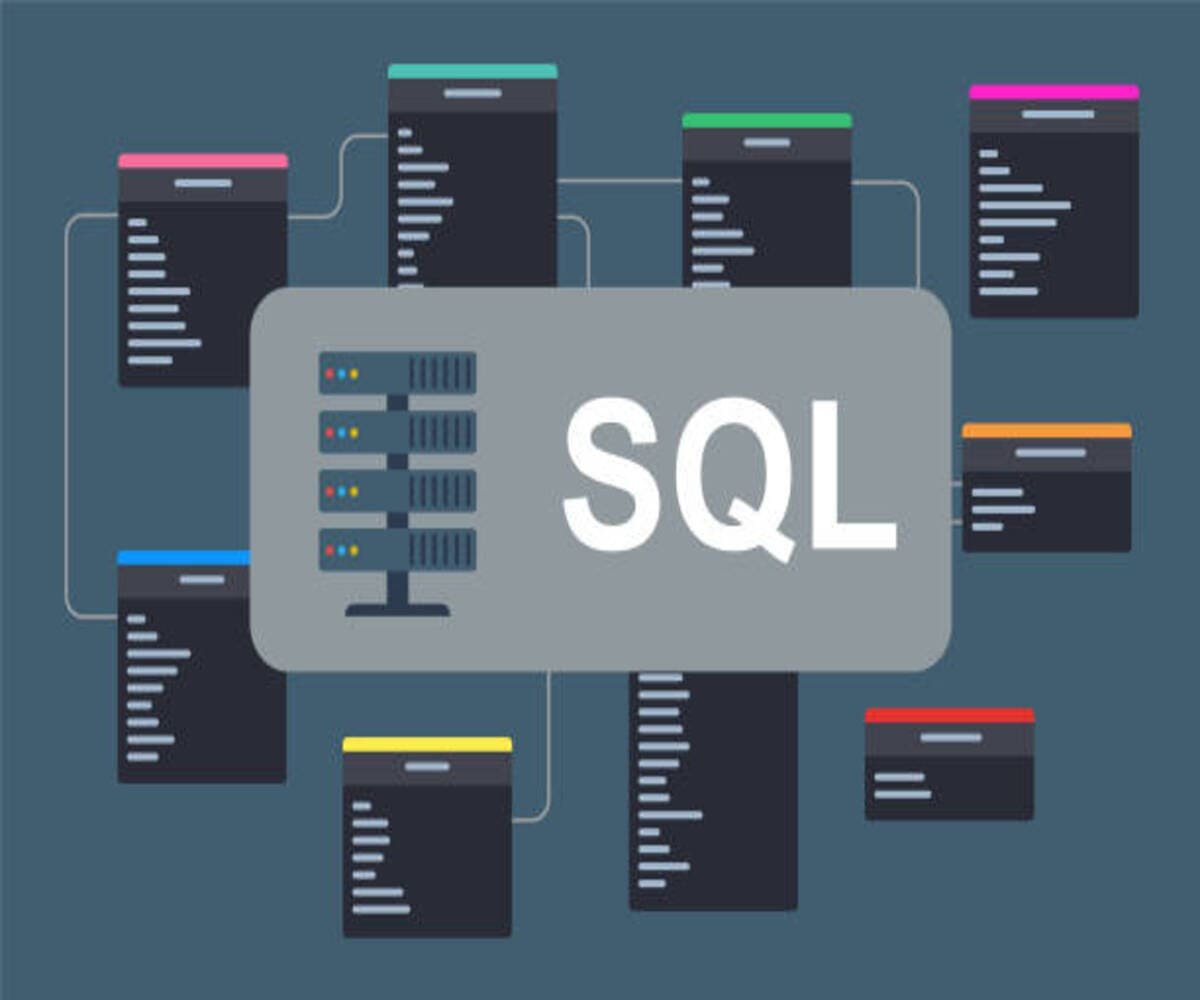
A Comprehensive Guide to Database Management Strategies: SQL (PostgreSQL, MySQL) vs. NoSQL (MongoDB, Redis)

Selecting the right database for your application is critical for ensuring high performance, scalability, and data integrity. With a variety of database options available, including SQL (Structured Query Language) and NoSQL (Not Only SQL) databases, it can be challenging to choose the one that fits your specific use case. This guide provides an in-depth comparison of SQL databases like PostgreSQL and MySQL, as well as NoSQL databases such as MongoDB and Redis, offering insights into their strengths, use cases, and strategies for managing them effectively.


What Are SQL Databases?

SQL databases, such as PostgreSQL and MySQL, are relational database management systems (RDBMS) that store data in structured tables with predefined schemas. SQL is used to manage and query data, making these databases suitable for applications that require data consistency, structured data, and complex queries.

Key Advantages of SQL Databases:

  • Strong Data Integrity: SQL databases support relationships between tables, which ensures data consistency and integrity through foreign keys, primary keys, and constraints.
  • ACID Compliance: SQL databases guarantee that transactions are handled reliably using the ACID properties (Atomicity, Consistency, Isolation, Durability).
  • Structured Data Management: SQL databases are ideal when the data structure is consistent and doesn’t change frequently.

Popular SQL Databases: PostgreSQL & MySQL

PostgreSQL

PostgreSQL is an open-source RDBMS known for its robustness, scalability, and ability to handle complex queries. It is well-suited for applications that require high consistency and advanced data processing.

Features of PostgreSQL:

  • Advanced Querying: It supports complex queries, joins, and nested queries.
  • Data Integrity: It offers full support for foreign keys, ACID compliance, and transactional integrity.
  • Extensibility: PostgreSQL allows users to create custom functions, types, and operators.
  • PostGIS: An extension that adds geographic information system (GIS) capabilities for geospatial data.

MySQL

MySQL is a widely used open-source RDBMS known for its simplicity and speed. It is a great choice for web applications that require fast data retrieval and moderate complexity.

Features of MySQL:

  • Performance: Optimized for fast reads and writes, making it suitable for high-traffic websites.
  • Replication: MySQL supports master-slave replication for data redundancy and high availability.
  • User-Friendly: It is easy to set up and configure, ideal for beginners and small to medium-sized applications.
  • Scalability: MySQL can scale vertically and horizontally, supporting enterprise-level applications.

What Are NoSQL Databases?

NoSQL databases, like MongoDB and Redis, are non-relational and handle unstructured or semi-structured data. They offer flexibility in terms of schema design and are designed to scale horizontally across multiple servers, which makes them ideal for applications with large amounts of diverse data.

Key Advantages of NoSQL Databases:

  • Scalability: NoSQL databases are designed to scale horizontally, which makes them ideal for applications that need to manage large amounts of distributed data.
  • Flexible Schema: NoSQL databases can store data without a predefined schema, allowing for changes to the data structure without disrupting the database.
  • Performance: Many NoSQL databases are optimized for high performance and low-latency data retrieval.

Popular NoSQL Databases: MongoDB & Redis

MongoDB

MongoDB is a document-oriented NoSQL database that stores data in flexible, JSON-like documents. It is known for its ease of use, scalability, and ability to handle large datasets.

Features of MongoDB:

  • Document-Based Storage: MongoDB stores data in BSON (Binary JSON) format, which allows for storing complex, nested data structures.
  • Horizontal Scaling: It supports sharding, distributing data across multiple servers, ensuring high scalability.
  • Schema Flexibility: MongoDB allows dynamic schema design, so you can easily adjust the structure of documents as your application evolves.
  • Aggregation: MongoDB includes a powerful aggregation framework for real-time analytics.

Redis

Redis is an in-memory data structure store that is primarily used for caching and real-time applications. It offers extremely low latency and high throughput, making it a popular choice for applications requiring fast access to data.

Features of Redis:

  • In-Memory Data Store: Redis keeps data in memory, resulting in extremely fast data access.
  • Versatile Data Structures: Redis supports strings, lists, sets, hashes, and more, providing versatility in data storage and retrieval.
  • Real-Time Messaging: Redis supports the publish/subscribe messaging paradigm, making it ideal for real-time applications like notifications and messaging services.
  • Persistence Options: Redis offers persistence options (RDB snapshots, AOF logs) to ensure data durability while maintaining speed.

Key Database Management Strategies

1. Choosing Between SQL and NoSQL

The choice between SQL and NoSQL databases largely depends on the requirements of your application:

  • When to Use SQL Databases:
    • Your data is structured and has predefined relationships.
    • You require ACID compliance for transactions.
    • Your queries involve complex joins or aggregations.
    • The data schema is stable and unlikely to change frequently.
  • When to Use NoSQL Databases:
    • Your data is semi-structured or unstructured.
    • Scalability and high availability are a priority.
    • Your data model needs to evolve quickly (schema flexibility).
    • You need low-latency access to data, such as in real-time applications.

2. Data Sharding and Partitioning

Both SQL and NoSQL databases can distribute data across multiple servers, but they do it in different ways:

  • Sharding in NoSQL: MongoDB uses sharding to distribute data across multiple nodes. Each shard contains a portion of the data, and MongoDB manages data distribution automatically.
  • Partitioning in SQL: PostgreSQL and MySQL offer partitioning strategies to divide data into smaller subsets, which can be distributed across multiple physical storage locations.

3. Replication for High Availability

Ensuring data availability is crucial for any application. Both SQL and NoSQL databases provide replication mechanisms:

  • SQL Replication: MySQL offers master-slave replication for backup and failover. PostgreSQL supports synchronous and asynchronous replication for high availability.
  • NoSQL Replication: MongoDB uses replica sets to provide redundancy and automatic failover. Redis also supports master-slave replication for high availability.

4. Caching with Redis

Redis is commonly used for caching in both SQL and NoSQL environments to speed up read-heavy operations. By caching frequently accessed data in memory, Redis reduces the load on the primary database.

  • Cache Data: Cache results from complex SQL queries or MongoDB aggregations to speed up data retrieval.
  • Session Management: Redis is often used for managing user sessions in web applications due to its speed and simplicity.

5. Indexing for Performance

Proper indexing improves the performance of queries and ensures that your application scales efficiently:

  • SQL Indexing: PostgreSQL and MySQL offer various indexing options such as B-trees, hash indexes, and full-text indexes to speed up searches.
  • NoSQL Indexing: MongoDB provides indexing on fields, including compound and geospatial indexes, to optimize query performance. Redis can index data using sorted sets.

Conclusion

Choosing the right database management strategy is essential to the performance and scalability of your application. SQL databases like PostgreSQL and MySQL offer strong consistency, complex queries, and data integrity, making them ideal for structured data with predefined relationships. NoSQL databases like MongoDB and Redis are perfect for applications requiring flexibility, horizontal scaling, and high performance, especially when dealing with unstructured or rapidly changing data.

By understanding the strengths of both SQL and NoSQL databases and employing strategies such as sharding, replication, and caching, you can optimize your database management for scalability, speed, and reliability.

18Feb

Mastering Async Processing with Celery and RabbitMQ: A Complete Guide

Asynchronous processing is a powerful technique for improving the performance and scalability of applications. It allows tasks that are time-consuming or resource-intensive to run in the background, freeing up system resources and improving the overall user experience. In this guide, we’ll explore how Celery and RabbitMQ can work together to implement asynchronous processing in your applications, improving efficiency and responsiveness.


What is Asynchronous Processing?

Asynchronous processing refers to the ability of a system to handle multiple tasks or requests independently of the main thread. Unlike synchronous operations, where tasks are processed one after the other, asynchronous tasks allow the system to continue executing other operations while waiting for long-running tasks to complete.

In web development, asynchronous processing is crucial for handling operations like sending emails, processing images, or running complex queries. By offloading these tasks to background workers, the main application can remain responsive to user interactions.

What is Celery?

Celery is a powerful, flexible, and easy-to-use distributed task queue for Python. It allows developers to manage background tasks asynchronously, enabling high-performance applications that can scale easily. Celery supports multiple messaging brokers, making it highly adaptable to various system architectures.

Key features of Celery include:

  • Task Queues: Celery enables the creation of task queues, where tasks are sent, received, and processed.
  • Concurrency: It supports concurrent task execution through multi-threading or multi-processing, enhancing performance.
  • Scheduling: Celery can schedule tasks to be executed periodically or at specific times, similar to cron jobs.
  • Task Result Management: Celery provides options for managing the results of tasks, whether they are successful, failed, or pending.

What is RabbitMQ?

RabbitMQ is a message broker that acts as a mediator between producers and consumers of messages in a distributed system. It facilitates communication between different parts of an application by ensuring that messages are sent, received, and processed asynchronously.

In the context of Celery, RabbitMQ is commonly used as the message broker. A message broker is responsible for:

  • Task Routing: RabbitMQ routes messages (tasks) to appropriate consumers (workers) for processing.
  • Message Queuing: RabbitMQ stores tasks in queues until they are picked up by workers for execution.
  • Reliability: RabbitMQ ensures that messages are not lost by supporting durable queues and persistent messaging.

How Celery and RabbitMQ Work Together

Celery and RabbitMQ work together to implement efficient asynchronous task processing. The architecture follows these steps:

  1. Producer (Application): The main application (also known as the producer) sends tasks to a message broker (RabbitMQ).
  2. RabbitMQ (Message Broker): RabbitMQ receives tasks and places them in a queue. It ensures that tasks are delivered to available consumers (workers).
  3. Consumer (Worker): Celery workers, which are background processes, retrieve tasks from the queue and execute them asynchronously.
  4. Result (Optional): Once the task is completed, the worker can send the result back to the producer (optional, depending on the task configuration).

The overall process ensures that time-consuming tasks are offloaded from the main application, improving the responsiveness and scalability of your system.


Setting Up Celery with RabbitMQ

To implement Celery with RabbitMQ in your Python application, you need to follow a few simple steps. Below is a basic guide to setting up Celery with RabbitMQ:

Step 1: Install Celery and RabbitMQ

First, you need to install Celery and RabbitMQ. You can install Celery using pip:

bash
pip install celery

To install RabbitMQ, you can follow the official installation guide for your operating system. RabbitMQ can run on most platforms and can be installed as a service.

Step 2: Configure Celery

In your Python project, create a celery.py file to configure Celery and connect it to RabbitMQ as the message broker.

python

from celery import Celery

app = Celery(‘tasks’, broker=‘pyamqp://guest@localhost//’)

@app.task
def add(x, y):
return x + y

Here:

  • Celery('tasks'): Defines the Celery application with the name tasks.
  • broker='pyamqp://guest@localhost//': Specifies RabbitMQ as the message broker (using the default credentials and host).

Step 3: Start RabbitMQ

Ensure that RabbitMQ is running on your machine. You can start RabbitMQ using the following command (on most systems):

bash
sudo systemctl start rabbitmq-server

Step 4: Create a Worker

Now, you need to start a Celery worker that will process tasks from the RabbitMQ queue.

In the terminal, run the following command:

bash
celery -A celery worker --loglevel=info

This command starts a Celery worker with the application defined in the celery.py file, ready to process tasks.

Step 5: Send Tasks to the Queue

You can now send tasks to the queue for asynchronous processing. Here’s how you can send a task:

python

from celery import Celery
from tasks import add

result = add.delay(4, 6) # The ‘delay’ method sends the task to the worker
print(f’Task result: {result.get()}) # Get the result of the task

The delay method sends the task to the Celery worker via RabbitMQ for execution. The result can be retrieved using the get() method.


Benefits of Using Celery with RabbitMQ

1. Improved Performance

By offloading long-running tasks to background workers, you free up system resources for other tasks, improving the overall performance of your application.

2. Scalability

Celery allows you to scale out your application by adding more workers to handle tasks concurrently. RabbitMQ ensures that tasks are distributed efficiently to workers.

3. Reliability

RabbitMQ ensures that tasks are not lost, even if the worker is temporarily unavailable. It guarantees message delivery, even in the case of network or worker failures.

4. Task Scheduling

Celery allows you to schedule tasks at specific intervals or at a later time, making it ideal for tasks like sending periodic emails, database cleanup, and more.


Common Use Cases for Celery and RabbitMQ

  • Sending Emails: Use Celery to send emails asynchronously, without blocking the main application thread.
  • Image Processing: Offload resource-intensive image manipulation tasks to Celery workers.
  • Real-Time Data Processing: Process large datasets asynchronously using Celery workers, especially for data-heavy applications like machine learning.
  • Background Tasks: Run background jobs such as generating reports, cleaning up databases, or performing complex computations.

Conclusion

Celery and RabbitMQ are a powerful combination for implementing asynchronous processing in Python applications. By offloading long-running tasks to background workers, you can improve the responsiveness and scalability of your system. Whether you’re handling emails, data processing, or background jobs, Celery and RabbitMQ offer a robust and reliable solution for managing asynchronous tasks efficiently.

18Feb

Understanding Data Privacy Laws: GDPR, CCPA, and HIPAA

In today’s digital age, protecting personal data has become a significant concern for businesses and consumers alike. As more sensitive information is shared online, various data privacy laws have been implemented to protect individuals’ rights and ensure businesses handle personal data responsibly. This article will explore three key data privacy laws that have made a significant impact: the General Data Protection Regulation (GDPR), the California Consumer Privacy Act (CCPA), and the Health Insurance Portability and Accountability Act (HIPAA). Let’s dive deeper into each of these laws and understand their importance.


What is Data Privacy?

Data privacy refers to the responsible handling of personal data to ensure individuals’ rights are protected. It includes practices such as secure data collection, storage, and sharing, ensuring that personal information is only used for its intended purpose. With the exponential growth of data in today’s digital world, safeguarding this information is not only a legal requirement but also a necessity for businesses to build trust with their customers.

General Data Protection Regulation (GDPR)

The General Data Protection Regulation (GDPR) is one of the most comprehensive data privacy laws globally. Enforced by the European Union (EU) in 2018, GDPR aims to protect the privacy and personal data of EU residents. It ensures that businesses treat personal data with respect and transparency.

Key Features of GDPR:

  • Personal Data Definition: GDPR covers any data that can identify an individual, such as names, email addresses, IP addresses, and even location data.

  • Informed Consent: Organizations must obtain explicit consent from individuals before collecting or processing their data.

  • Rights of Individuals: GDPR grants individuals the right to access their data, request corrections, delete information, and transfer their data to another service provider.

  • Breach Notifications: Businesses must report data breaches to the appropriate authorities and affected individuals within 72 hours.

  • Data Protection by Design and Default: GDPR mandates that businesses implement data protection measures from the start of any project, ensuring privacy is maintained by default.

Penalties for Non-Compliance:

Failure to comply with GDPR can result in fines of up to €20 million or 4% of global annual turnover, whichever is higher.


California Consumer Privacy Act (CCPA)

The California Consumer Privacy Act (CCPA), introduced in 2020, is a state-level privacy law in California, USA. It gives California residents greater control over their personal information, particularly regarding how businesses collect, use, and share their data.

Key Features of CCPA:

  • Consumer Rights: California residents can request access to their data, delete it, and opt-out of having their data sold to third parties.

  • Notice of Data Collection: Businesses must inform consumers about the types of data they collect and how they intend to use it.

  • Opt-Out Mechanism: Consumers can opt-out of the sale of their personal data through a “Do Not Sell My Personal Information” link.

  • Non-Discrimination: Businesses cannot discriminate against consumers who exercise their CCPA rights, such as denying them services or charging higher prices.

Penalties for Non-Compliance:

Non-compliant businesses may face fines of up to $7,500 per violation. Consumers may also take legal action if their rights are violated.


Health Insurance Portability and Accountability Act (HIPAA)

HIPAA is a U.S. law designed to protect sensitive health information. It applies to healthcare providers, insurance companies, and healthcare clearinghouses handling protected health information (PHI), ensuring that patient data remains secure and private.

Key Features of HIPAA:

  • Protected Health Information (PHI): HIPAA covers all personal health information, including medical records, billing information, and any data related to an individual’s health.

  • Privacy Rule: This rule ensures that PHI is only shared for specific purposes, such as treatment, payment, and healthcare operations.

  • Security Rule: HIPAA requires that healthcare organizations protect electronic PHI (ePHI) through safeguards such as encryption and access control mechanisms.

  • Breach Notification: If PHI is breached, organizations must notify the affected individuals and the U.S. Department of Health and Human Services (HHS) within a specified time frame.

Penalties for Non-Compliance:

Violations of HIPAA can lead to civil fines of up to $50,000 per violation and criminal penalties, including fines and imprisonment for severe offenses.


Comparing GDPR, CCPA, and HIPAA

Feature GDPR (EU) CCPA (California, USA) HIPAA (USA)
Scope Applies to all EU citizens, regardless of where the company is based. Applies to California residents and businesses that process their data. Applies to healthcare entities handling PHI.
Personal Data Definition Any data that can identify an individual, such as names, emails, and IP addresses. Any personal information that can identify an individual. Health-related information, including medical records and billing details.
Rights of Individuals Right to access, correct, delete, and transfer data. Right to access, delete, and opt-out of data sales. Right to access and amend health records.
Penalties Fines of up to €20 million or 4% of global turnover. Fines up to $7,500 per violation. Fines up to $50,000 per violation.
Breach Notification Must notify within 72 hours of a breach. No explicit requirement, but consumers can sue. Must notify within 60 days.

Why Data Privacy Laws Matter

Data privacy laws like GDPR, CCPA, and HIPAA are crucial in safeguarding individuals’ personal data in an increasingly connected world. These laws not only help protect consumers but also ensure that organizations handle data responsibly. For businesses, adhering to these laws can prevent hefty fines, protect their reputation, and maintain customer trust. Additionally, data privacy regulations empower individuals to have control over their personal data, fostering a more transparent and accountable digital ecosystem.


Conclusion

As data privacy concerns continue to rise, GDPR, CCPA, and HIPAA serve as essential frameworks that protect personal and sensitive information. By understanding the key provisions of these laws and implementing robust data protection strategies, businesses can ensure compliance, avoid penalties, and maintain their customers’ trust in an increasingly data-driven world.

17Feb

A Comprehensive Guide to CatBoost: The Powerful Gradient Boosting Algorithm for Categorical Data

Introduction

CatBoost (Categorical Boosting) is an advanced gradient boosting algorithm specifically designed to handle categorical features efficiently. Developed by Yandex, CatBoost outperforms traditional boosting algorithms in terms of accuracy, speed, and ease of implementation.

This guide explores CatBoost’s working principles, key features, advantages, and real-world applications, particularly in business analytics, HR analytics, and predictive modeling.


What is CatBoost?

CatBoost is a gradient boosting algorithm that builds an ensemble of decision trees to improve predictive accuracy. Unlike traditional boosting methods, CatBoost excels in handling categorical data natively, eliminating the need for extensive preprocessing like one-hot encoding.

CatBoost is widely used for:
Classification & Regression tasks
HR & Business Analytics
Financial forecasting & risk assessment
Healthcare & fraud detection

It is highly efficient for structured datasets, making it an excellent choice for HR professionals, business leaders, and data scientists.


How CatBoost Works

CatBoost operates on a gradient boosting framework but introduces unique features that differentiate it from other boosting algorithms like XGBoost and LightGBM.

1. Ordered Boosting (Avoiding Target Leakage)

Unlike other gradient boosting models that use all previous data points for tree construction, CatBoost carefully selects data points to prevent target leakage and improve generalization.

2. Native Handling of Categorical Features

Instead of one-hot encoding, CatBoost automatically encodes categorical features using an advanced method called ordered target statistics. This approach significantly reduces memory usage and improves training efficiency.

3. Symmetric Tree Structure

CatBoost uses symmetric decision trees, meaning each split occurs at the same level for all branches. This ensures:
Faster predictions
Reduced overfitting
Efficient model training

4. Efficient GPU Acceleration

CatBoost supports GPU training, making it one of the fastest gradient boosting algorithms available.


Key Features of CatBoost

Native Categorical Feature Handling: No need for manual encoding or preprocessing.
Robust Against Overfitting: Ordered boosting prevents data leakage.
Fast & Scalable: Can process massive datasets efficiently.
Highly Accurate: Often outperforms XGBoost and LightGBM on structured datasets.
Handles Missing Data Automatically: No need for imputation.
Supports Multi-Class Classification & Regression: Versatile for different types of machine learning tasks.


Advantages of CatBoost

1. Best for Categorical Data

CatBoost is designed for datasets with many categorical features, making it ideal for HR analytics, customer segmentation, and business intelligence.

2. No Need for Extensive Preprocessing

Unlike XGBoost and LightGBM, which require one-hot encoding or label encoding, CatBoost handles categorical variables natively, saving time and computational resources.

3. Prevents Overfitting

CatBoost’s ordered boosting method ensures that the model does not use future data to make predictions, leading to better generalization.

4. Faster Predictions

Thanks to its symmetric tree structure, CatBoost is highly efficient at making real-time predictions, making it suitable for business applications requiring fast decision-making.

5. Works Well with Small Datasets

While LightGBM and XGBoost excel in large datasets, CatBoost performs exceptionally well even on smaller datasets, which is useful in domains like HR analytics and talent management.


CatBoost vs. XGBoost vs. LightGBM: A Quick Comparison

Feature CatBoost XGBoost LightGBM
Tree Growth Symmetric Depth-wise Leaf-wise
Speed Fast Moderate Very fast
Memory Usage Moderate High Low
Categorical Feature Handling Native One-hot encoding required Limited support
Overfitting Prevention Strong Moderate Moderate
Best Use Case Categorical data General ML tasks Large datasets

If your dataset has many categorical features, CatBoost is the best choice.


Applications of CatBoost in Business and HR Analytics

1. Employee Performance Prediction

CatBoost can analyze employee skills, experience, and engagement to predict future performance and training needs.

2. Recruitment & Talent Acquisition

By processing resumes and job descriptions, CatBoost helps HR teams identify the best candidates for specific roles.

3. Employee Churn Prediction

Predict which employees are likely to leave, allowing HR teams to take proactive retention measures.

4. Customer Segmentation & Personalization

CatBoost helps businesses segment customers based on demographics, purchase behavior, and preferences, allowing for targeted marketing strategies.

5. Fraud Detection in Finance

CatBoost is used in banking and finance to detect fraudulent transactions based on transaction history and patterns.


Implementing CatBoost in Python

Here’s a simple step-by-step guide to using CatBoost for classification:

Step 1: Install CatBoost

bash
pip install catboost

Step 2: Import Required Libraries

python
import catboost
from catboost import CatBoostClassifier
from sklearn.model_selection import train_test_split
from sklearn.metrics import accuracy_score
from sklearn.datasets import load_breast_cancer
import pandas as pd

Step 3: Load Dataset

python
data = load_breast_cancer()
X = pd.DataFrame(data.data, columns=data.feature_names)
y = data.target
X_train, X_test, y_train, y_test = train_test_split(X, y, test_size=0.2, random_state=42)

Step 4: Create & Train the CatBoost Model

python
model = CatBoostClassifier(iterations=1000, learning_rate=0.1, depth=6, loss_function='Logloss', verbose=200)
model.fit(X_train, y_train)

Step 5: Make Predictions & Evaluate the Model

python
y_pred = model.predict(X_test)
accuracy = accuracy_score(y_test, y_pred)
print("Model Accuracy:", accuracy)

Conclusion

CatBoost is an efficient, high-performance gradient boosting algorithm that excels in handling categorical data. Its ability to handle categorical features natively, prevent overfitting, and provide high accuracy makes it a top choice for business and HR analytics.

If you’re working with HR data, recruitment analytics, employee retention strategies, customer segmentation, or financial forecasting, CatBoost is an excellent choice for achieving superior results.

17Feb

A Comprehensive Guide to LightGBM: The Fast and Efficient Gradient Boosting Algorithm

Introduction

LightGBM (Light Gradient Boosting Machine) is a powerful gradient boosting algorithm designed to handle large datasets with exceptional speed and accuracy. Developed by Microsoft, It is optimized for performance and efficiency, making it a top choice for machine learning tasks such as classification, regression, and ranking.

This article explores LightGBM’s working principles, key features, advantages, and practical applications, especially in business analytics, HR analytics, and predictive modeling.

What is LightGBM?

LightGBM is an implementation of gradient boosting, an ensemble learning technique that builds multiple weak models (typically decision trees) to create a strong predictive model. However, unlike traditional boosting algorithms, It is employs innovative strategies to improve efficiency and scalability.

It uses a histogram-based learning approach and a unique leaf-wise tree growth strategy, making it significantly faster than other boosting frameworks like XGBoost.

How LightGBM Works

LightGBM builds decision trees in a step-by-step manner, continuously improving the model by reducing errors. Here’s a breakdown of its process:

  1. Histogram-based Binning:

    • Instead of scanning all data points, LightGBM groups feature values into discrete bins, reducing computation and memory usage.
  2. Leaf-wise Tree Growth:

    • Unlike traditional depth-wise tree growth (used in XGBoost), LightGBM splits the leaf that reduces the loss the most.
    • This leads to deeper trees and better accuracy, especially for large datasets.
  3. Gradient-based One-Side Sampling (GOSS):

    • It prioritizes data points with large gradients while ignoring low-gradient samples, speeding up the training process without losing accuracy.
  4. Exclusive Feature Bundling (EFB):

    • It combines sparse features into a single feature, reducing complexity and improving computational efficiency.

Key Features-

  • Speed & Scalability: It is significantly faster than traditional gradient boosting models, making it suitable for large datasets.
  • Efficient Memory Usage: Its histogram-based approach reduces memory consumption while maintaining high accuracy.
  • Better Handling of Large Datasets: It processes massive datasets efficiently, outperforming traditional boosting methods.
  • Lower Overfitting: Advanced regularization techniques prevent overfitting, improving generalization.
  • Supports Categorical Features: Unlike XGBoost, which requires one-hot encoding, LightGBM natively supports categorical features, reducing preprocessing time.

Advantages-

  1. Faster Training Speed:

    • Thanks to histogram-based learning and optimized algorithms, LightGBM can train models up to 20x faster than XGBoost on large datasets.
  2. Handles Large-Scale Data Efficiently:

    • It is specifically designed for high-dimensional and large-scale data, making it ideal for business applications.
  3. Higher Accuracy:

    • The leaf-wise growth strategy often results in better accuracy compared to depth-wise growth used in other algorithms.
  4. Optimized for Distributed Systems:

    • It supports parallel and GPU training, making it suitable for cloud-based machine learning pipelines.
  5. Built-in Feature Selection:

    • It automatically identifies and removes less useful features, reducing the need for extensive preprocessing.

LightGBM vs. XGBoost: A Quick Comparison

Feature LightGBM XGBoost
Tree Growth Leaf-wise Depth-wise
Speed Faster Slower (but more robust)
Memory Usage Low High
Handling Large Datasets Excellent Good
Support for Categorical Features Yes (natively) Requires one-hot encoding
Regularization Strong Moderate

LightGBM is often preferred for large datasets, while XGBoost is more stable for smaller datasets and complex scenarios.

Applications in Business and HR Analytics

1. HR Analytics and Employee Performance Prediction

LightGBM can analyze employee data (work history, engagement, performance) to predict potential high-performers and areas for improvement.

2. Recruitment and Resume Screening

By processing large volumes of candidate data, It helps HR professionals identify top talent based on skills, experience, and qualifications.

3. Employee Churn Prediction

Organizations can use It to predict which employees are likely to leave based on historical trends, enabling proactive retention strategies.

4. Customer Segmentation and Business Analytics

LightGBM’s fast processing speed makes it ideal for segmenting customers based on behavior, demographics, and preferences.

5. Fraud Detection

Financial institutions and businesses use It for fraud detection by identifying anomalies in transaction patterns.

Implementing in Python

Here’s a step-by-step guide to implementing LightGBM using Python:

Step 1: Install LightGBM

bash
pip install lightgbm

Step 2: Import Required Libraries

python
import lightgbm as lgb
import pandas as pd
import numpy as np
from sklearn.model_selection import train_test_split
from sklearn.metrics import accuracy_score
from sklearn.datasets import load_breast_cancer

Step 3: Load Dataset

python
data = load_breast_cancer()
X = pd.DataFrame(data.data, columns=data.feature_names)
y = data.target
X_train, X_test, y_train, y_test = train_test_split(X, y, test_size=0.2, random_state=42)

Step 4: Create and Train LightGBM Model

python

train_data = lgb.Dataset(X_train, label=y_train)
test_data = lgb.Dataset(X_test, label=y_test, reference=train_data)

params = {
‘objective’: ‘binary’,
‘metric’: ‘binary_error’,
‘boosting_type’: ‘gbdt’,
‘learning_rate’: 0.1,
‘num_leaves’: 31,
‘max_depth’: –1
}

model = lgb.train(params, train_data, valid_sets=[test_data], num_boost_round=100, early_stopping_rounds=10)

Step 5: Make Predictions and Evaluate the Model

python
y_pred = model.predict(X_test)
y_pred_binary = [1 if pred > 0.5 else 0 for pred in y_pred]
accuracy = accuracy_score(y_test, y_pred_binary)
print("Model Accuracy:", accuracy)

Conclusion

LightGBM is one of the fastest and most efficient gradient boosting algorithms, making it an ideal choice for large datasets and real-world applications. Whether it’s HR analytics, customer segmentation, fraud detection, or predictive modeling, LightGBM’s speed and accuracy make it a valuable tool for data scientists and business analysts.

By leveraging LightGBM in machine learning pipelines, businesses can gain actionable insights, improve decision-making, and drive data-driven success in various domains.

17Feb

A Comprehensive Guide to XGBoost (Gradient Boosting Algorithm) for Enhanced Machine Learning Models

Introduction

XGBoost (Extreme Gradient Boosting) is one of the most powerful and widely used machine learning algorithms for structured data. Known for its speed, accuracy, and efficiency, XGBoost has become a go-to solution for predictive modeling in fields like HR analytics, business intelligence, finance, and healthcare.

In this article, we will explore:
How XGBoost works
Key features and advantages
Comparison with LightGBM and CatBoost
Applications in business and HR analytics
Step-by-step Python implementation

Let’s dive into this high-performance gradient boosting algorithm!


What is XGBoost?

XGBoost is a scalable and optimized gradient boosting library designed to enhance decision tree-based models. It improves predictive performance by iteratively training models and correcting errors, making it highly effective for both classification and regression tasks.

Fast and efficient: Handles large datasets with minimal computation time
High accuracy: Outperforms traditional machine learning models
Feature-rich: Supports missing values, parallel processing, and regularization
Widely used: Dominates Kaggle competitions and real-world applications

XGBoost is particularly useful for structured data, such as HR analytics, sales forecasting, credit risk analysis, and customer segmentation.


How XGBoost Works

XGBoost is based on the concept of boosting, where multiple weak learners (decision trees) are combined to form a strong model. Here’s how it works:

1. Boosting Framework

✔ XGBoost uses gradient boosting, where each new tree corrects the mistakes of the previous trees.
✔ The model learns residual errors and improves accuracy over multiple iterations.

2. Tree-Based Learning

✔ XGBoost builds decision trees sequentially, each improving the previous ones.
✔ The final model is an ensemble of multiple boosted trees.

3. Regularization for Overfitting Prevention

✔ Unlike traditional gradient boosting, XGBoost includes L1 (Lasso) and L2 (Ridge) regularization, which prevent overfitting and improve generalization.

4. Parallel Processing & Hardware Optimization

✔ XGBoost supports multi-core CPU and GPU training, making it much faster than traditional boosting algorithms.

5. Missing Value Handling

✔ XGBoost automatically identifies and handles missing data without requiring manual imputation.


Key Features of XGBoost

Optimized Performance: Uses advanced techniques like parallel processing and GPU acceleration.
High Accuracy: Outperforms traditional decision trees and random forests.
Regularization Support: Prevents overfitting using L1 and L2 regularization.
Built-in Cross-Validation: Ensures robust model performance.
Feature Importance Analysis: Identifies the most significant features for prediction.
Supports Classification & Regression: Versatile for various predictive modeling tasks.


Advantages of XGBoost

1. Exceptional Speed and Efficiency

✔ XGBoost is designed for high-speed training and can handle large datasets efficiently.
✔ Uses parallel processing to speed up computations.

2. Handles Missing Data Automatically

✔ No need for manual imputation—XGBoost learns the best splits even with missing values.

3. Robust to Overfitting

✔ Incorporates regularization techniques (L1 & L2 penalties) to prevent model complexity.

4. Feature Selection and Importance Ranking

✔ Provides insights into which features contribute the most to predictions.

5. Works Well with Tabular Data

✔ Unlike deep learning models, which struggle with structured datasets, XGBoost excels at tabular data applications.


XGBoost vs. LightGBM vs. CatBoost: A Quick Comparison

Feature XGBoost LightGBM CatBoost
Tree Growth Depth-wise Leaf-wise Symmetric
Speed Fast Very fast Moderate
Memory Usage High Low Moderate
Categorical Feature Handling Requires one-hot encoding Limited support Native
Overfitting Prevention Strong Moderate Strong
Best Use Case General ML tasks Large datasets Categorical data

If you need a general-purpose, high-performance boosting algorithm, XGBoost is an excellent choice.


Applications of XGBoost in Business and HR Analytics

1. Employee Performance Prediction

✔ Helps HR teams analyze employee skills, training needs, and future performance trends.

2. Recruitment & Talent Acquisition

✔ Identifies top candidates by analyzing resumes, past experience, and job fit.

3. Employee Attrition & Retention

✔ Predicts which employees are likely to leave based on engagement levels and job satisfaction.

4. Sales Forecasting & Business Intelligence

✔ Analyzes historical sales data to predict future trends.

5. Credit Scoring & Fraud Detection

✔ Used by banks and financial institutions to assess credit risk and detect fraudulent transactions.


Implementing XGBoost in Python

Step 1: Install XGBoost

bash
pip install xgboost

Step 2: Import Required Libraries

python
import xgboost as xgb
from sklearn.model_selection import train_test_split
from sklearn.metrics import accuracy_score
from sklearn.datasets import load_breast_cancer
import pandas as pd

Step 3: Load Dataset

python
data = load_breast_cancer()
X = pd.DataFrame(data.data, columns=data.feature_names)
y = data.target
X_train, X_test, y_train, y_test = train_test_split(X, y, test_size=0.2, random_state=42)

Step 4: Create & Train the XGBoost Model

python
model = xgb.XGBClassifier(n_estimators=100, learning_rate=0.1, max_depth=6, objective='binary:logistic', use_label_encoder=False, eval_metric='logloss')
model.fit(X_train, y_train)

Step 5: Make Predictions & Evaluate the Model

python
y_pred = model.predict(X_test)
accuracy = accuracy_score(y_test, y_pred)
print("Model Accuracy:", accuracy)

Conclusion

XGBoost is a high-performance gradient boosting algorithm that offers exceptional accuracy, speed, and efficiency. It is widely used across industries for predictive analytics, HR insights, business intelligence, and financial forecasting.

✔ If you’re looking for a fast, scalable, and accurate machine learning model, XGBoost is one of the best choices available!

15Feb

Code Quality and Maintainability Improves Software Reliability

Introduction to Code Quality & Maintainability

Code quality and maintainability are critical aspects of software development that ensure applications are efficient, scalable, and easy to understand. High-quality code minimizes technical debt, enhances performance, and simplifies future modifications.

Key Characteristics of High-Quality Code

  • Readability: Code should be easy to read and understand.
  • Modularity: Breaks functionality into small, reusable components.
  • Scalability: Supports future growth without major changes.
  • Efficiency: Optimizes performance and resource utilization.
  • Security: Protects against vulnerabilities and exploits.

Best Practices for Code Quality

1. Follow Coding Standards

Adhering to established coding standards ensures consistency across projects. Popular standards include:

  • Google Style Guide (C++, Java, Python)
  • PEP 8 (Python)
  • Airbnb JavaScript Style Guide

2. Write Clean and Readable Code

  • Use meaningful variable and function names.
  • Avoid deep nesting.
  • Keep functions short and focused.
  • Use consistent indentation and formatting.

3. Use Version Control Systems (VCS)

  • Utilize Git for tracking changes.
  • Follow best practices like feature branching and commit messages.

4. Implement Code Reviews

  • Peer reviews help identify potential issues early.
  • Automated code review tools like SonarQube and CodeClimate enhance quality.

5. Write Unit and Integration Tests

  • Test-Driven Development (TDD) improves reliability.
  • Use testing frameworks like JUnit (Java), Jest (JavaScript), and PyTest (Python).

Ensuring Code Maintainability

1. Follow SOLID Principles

  • Single Responsibility Principle (SRP): A class should have only one reason to change.
  • Open/Closed Principle (OCP): Code should be open for extension but closed for modification.
  • Liskov Substitution Principle (LSP): Subtypes must be substitutable for their base types.
  • Interface Segregation Principle (ISP): Clients should not depend on interfaces they don’t use.
  • Dependency Inversion Principle (DIP): Depend on abstractions, not concretions.

Find Details About SOLID Principles

2. Refactor Regularly

Refactoring improves code structure without changing functionality. Techniques include:

  • Removing duplicate code.
  • Extracting methods for clarity.
  • Renaming variables and functions for better readability.

3. Documentation and Comments

  • Document key functions, APIs, and complex logic.
  • Use inline comments sparingly but effectively.

4. Use Static Code Analysis Tools

  • Tools like ESLint, Prettier, and Checkstyle help enforce best practices.
  • Detects issues before deployment.

Conclusion

Ensuring high code quality and maintainability improves software reliability, reduces costs, and enhances collaboration. By following best practices, utilizing tools, and committing to continuous improvement, developers can build robust and scalable applications.